Mostrando entradas con la etiqueta Astor. Mostrar todas las entradas

viernes, 26 de julio de 2013

Work-safe Saran Wrap Manicure

Howdy & HAPPY FRIDAY!

This is one happy day: the day I am starting three whole weeks of holidays. -- The Three Holy Weeks -- I will head to Collioure (France) tomorrow with The Boyfriend, but intend to spend the hottest hours of the day being creative and exploring the nail art world I have been unwillingly neglecting for far too long!

Today's post is my take at a soft and classy manicure wearable at work: a pink and nude saran wrap! Proved to be work-safe: when remarked this week, they have been complimented on :) I was gratified with an "oh wow, your nails match your dress. I am positively impressed. Ah? And you do them yourself? Well, I admire you!". EGO-BOOST.
The ingredients are: two coats of Kiko 372 Nude (of which I bought a back-up just today. My first back-up bottle ever; and that must be worth something!) and one coat of Astor Tickle my Triangle, saran-wrapped, if that's even an expression.

Off I go then, take care!

M.

miércoles, 17 de julio de 2013

TUTORIAL: Totum Revolutum manicure

Hey you :)

As promised, here's the tutorial for my multi-colored manicure, that I called Totum Revolutum (click here)! Here's what you will going to need:
Introductory notes:

  • Your base coat should be chosen wisely according to the result you are willing to achieve (i. e. for a neon finish, pick up a white), especially if the colors you have chosen are not 100% opaque (hello jellies!).
  • The plastic sheet can be replaced by almost anything plastic, provided that it is easily pliable. You will need to bend it, so try to avoid anything too stiff.
  • The plastic sheet can be transparent or opaque, but remember that only the first will allow you to see: (i) if the polish has covered the wole nail, and (ii) the approximate pattern you've obtained.
  • The paper sheet is merely here to provide you somewhere to stick the plastic pieces after using them, you can replace it by anything of your choice that suits this purpose.
  • I chose three cremes for this tutorial, but there's really no number limit (between 2 colors and the infinity, you're good).

Let's get started:

1. After applying your base color and letting it dry, the first thing you should do is prepare all the nail ware you will going to use for the Totum Revolutum

Cut as many pieces of plastic sheet as nails you will be polishing, and even some more just in case. The pieces should be rectangular, as shown below, so that you can rest your finger on it, securing it, and still use it to mix the colors you have chosen.
2. Work somewhere polish-proof; I used the same ol' plastic mat I use for all my manis.

Start adding blobs of colors randomly, and be sure to be generous. Otherwise, the colors will not mix and the result won't be as nice:
3. The result should look something like the picture below. Let's pospose the cuticle flooding worrying here and let's enjoy the mess!
4. Place a plastic sheet under your finger and secure it so the plastic won't move. Take the other end of the plastic piece and place it over your nail:
5. Stick the plastic to the wet polish on your nail...
6. ... and press your finger randomly over the plastic and the polish, so that the colors will start to blend together. No need to be gentle, but try to cover the whole nail! When you see a nice result through the plastic, take it off.
If you're not satisfied with the end result after taking off the plastic, you can add some more blobs of color and start again right away, until you're happy with it.

Remember to stick the plastic you just used face down on a piece of paper so as to avoid making more of a mess than necessary ;)
7. Use a wooden stick to take the excess polish off your cuticle area and try to trace a nice and curvy line to follow duning the clean up process.

8. Messy as it is, let it dry. 

I waited for around 15 minutes before moving to the next step. It worked for me, but you will want to wait for a little longer if you haven't used speedy dry polishes, or if you have re-started the process on some of the nails ;)
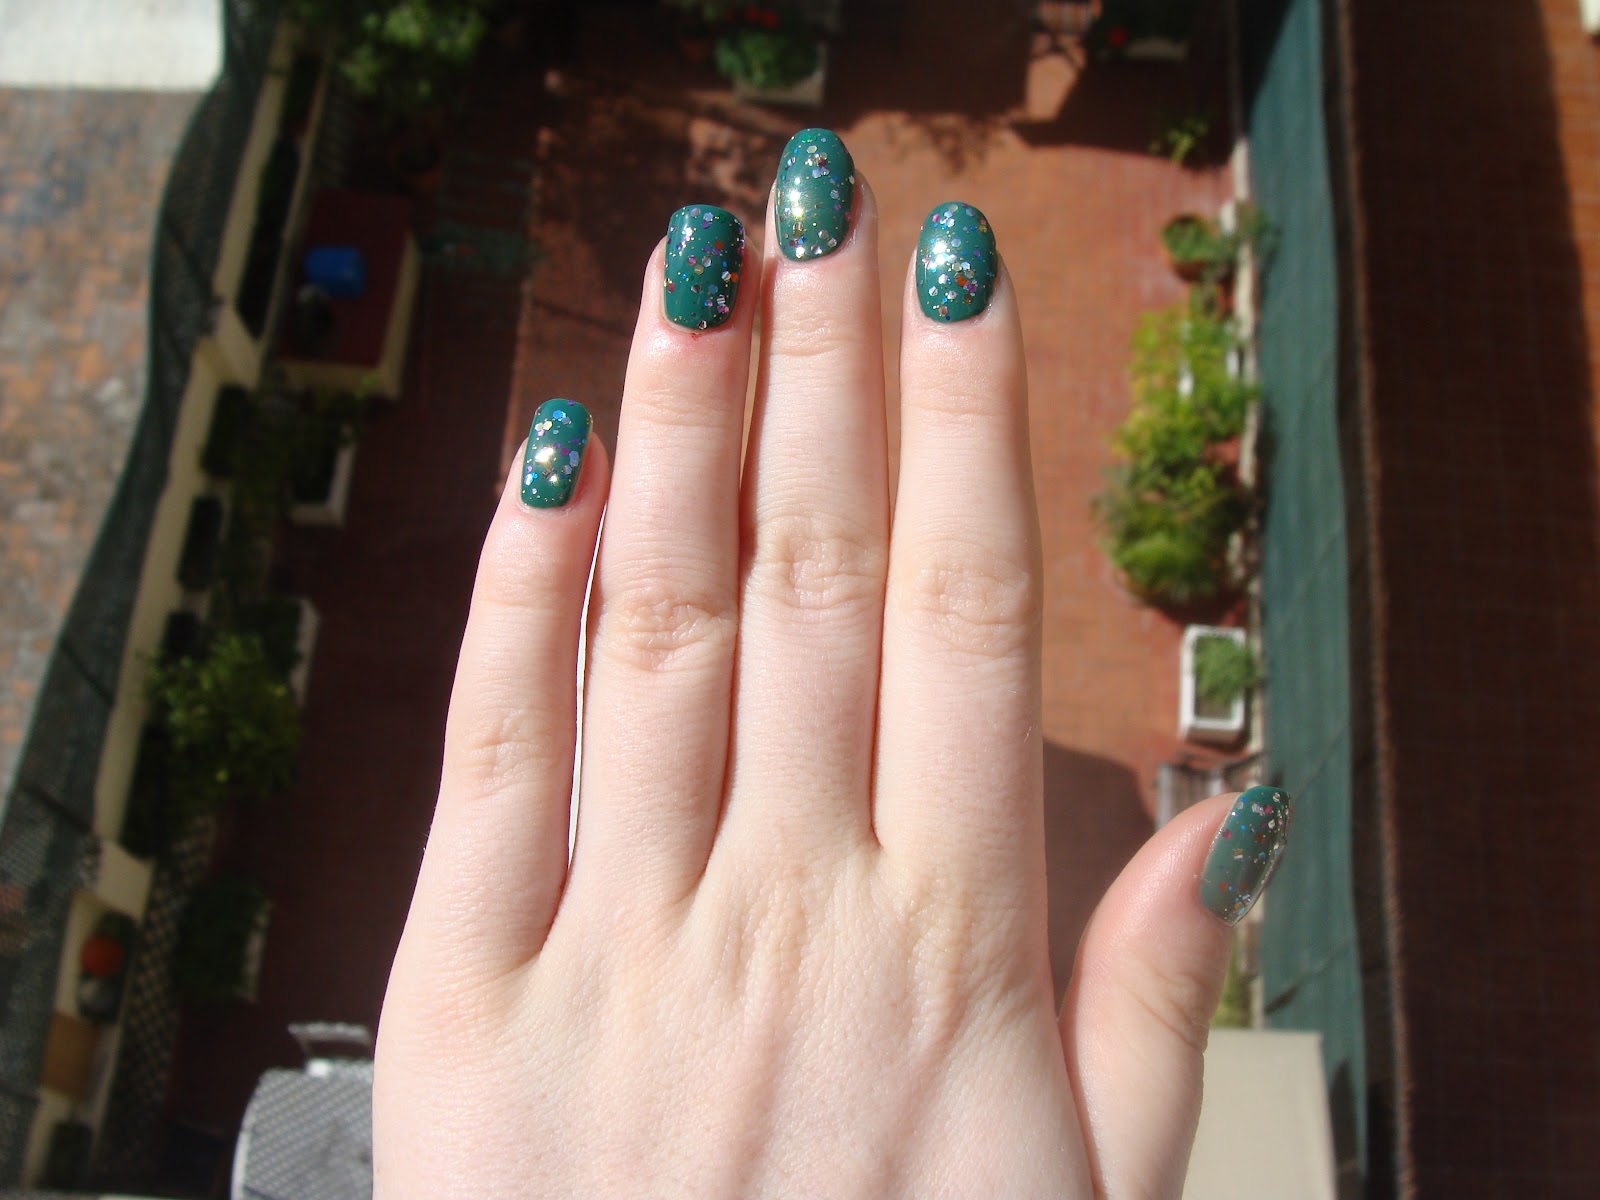
 9. When dry, clean the whole thing up and top coat it! Voilà!
I hope this tutorial will help you in your manicure adventures :) Please do not hesitate to comment below with the links to your own Totum Revolutum, I'd be happy to see what y'all came up with!

Take care,

M.

domingo, 14 de julio de 2013

Totum Revolutum manicure

Howdy! :)

This weekend was as calm as it promised to be, and I took advantage of that to be creative.

I have been eyeballing gorgeous watercolor manicures for quite a while (if you have any good tutorial at hand please figuratively throw it my way!) and... this manicure came up:
The technique I used is very simple, but I will let the pictures do the talking for today ;) The colors used were: Astor's Tickle my Triangle (pink), China Glaze's Kinetic Candy (blue) and Kiko's Melon (orange). But I think it offers endless possibilities... and will probably recreate this with neons, for a start! 

The way the colors end up blending together in some areas, the latin expression Totum Revolutum came to mind... It will be a Totum Revolutum manicure for me, from now on! How do you like it?

As creative as I was I managed to get a photo-tutorial done, for those of you who are interested! I will post this next week, so stay tuned :)

Bonus pic:
Take care,

M.

miércoles, 22 de mayo de 2013

ABC Challenge: Letter T - Astor Tickle my Triangle + Bourjois stickers

Hao everyone!

For today's installment I have Astor's most porn polish: Tickle my Triangle. Seriously though, am I alone in thinking this is sex-related? Despite of its name, I sported a quite understated manicure:
The birds are from Bourjois Easy Nail Art kit that my mama brought me back from Paris ^^ It comes with some striping tape and 92 stickers, and I just love it. Aren't those little black swallows über cute? I love swallows... I will never ever get a tattoo done because I hate even the idea to be bound to something permanently. BUT if John McClane was to point a gun to my face and force me to? I'd have a vintage swallow just like so:
My impression is that the stickers should/could have been flatter; my perfectionist polish-lover eye kept seing the borders of the bird sticking out... But I am sure I was the only one to notice! :)

Do not forget to enter my GIVEAWAY if you're interested in winning Kiko's Sun Pearl Lacquer collection!

Take care,

M.


domingo, 22 de abril de 2012

Astor Green Forest + Essence Confetti Circus + Matte


Hi there!

Yesterday was such a great day! One of my friends turns a year wiser tomorrow and had planned on doing something special and different than our oh-so-cozy meeting for coffee, chocolate and cake or its night version with dinner and drinks. So we all went a little out of our comfort box and... had a Tuppersex! Only girls, and focused on playing in couple.

I thought I would need something bright and bold on my nails, so I applied two coats of Astor Laque Deluxe in Forest Green. 

Now, I have mixed feelings towards this polish: the brush really sucks, and the formula is slightly thicker than it should be. But nothing major. On the other side, it's a one coater and dries amazingly fast! And the colour... Watcha say? 

I then added one coat of Essence Circus Confetti + a coat of SV.

Look at that in the sun!

Last touch: 1 coat of mattifier. Voilà!

I agree with you, the matte effect is not that visible. This mattifier from Fairwind seems to be a little shy, but it's okay with me for I'm initiating to the matte world.

The Tuppersex was so much fun! We spent almost 3 hours genuinely laughing and each one of us bought at least two things! I totally recommend this if you want to have fun and are new to the world of sex toys & co. We had a session for beginners, but it is possible to have a much more “pro” counsel, depending on how adventurous you are ;)

Take care =)