miércoles, 31 de julio de 2013

Mish Mash Challenge - Purple. Superficially Colorful Lacquer in GIGGLY!

Hello there!

The ladies behind the ABC Challenge could not (virtually) live without one another. It has been such a great way to get to know each other, the group has grown strong and... decided to concoct yet another challenge! I am happy to announce the start of the MISH MASH CHALLENGE! :)

Day 1: Purple. 
My dear friend Jin from Superficially Colorful sent me a package with her Mood Swings collection, along with some other gorgeous goodies, which I received just before leaving for my week in France. To say that I was happy is an understatement; my neighbors were alarmed and my ceiling still shows some bumps... ;) 

I thought today's topic was the perfect occasion to introduce Superficially Colorful Lacquer's Giggly, from the Mood Swings collection! This gorgeous polish shifts from dark purple to hot pink, and I have been absolutely in love with it since I put it on:
The formula, the jar and the brush were perfect. What you see are two coats of Giggly applied like butter and a coat of INM Out the Door. Here in Collioure the temperature is crazy hot so most of the time the mani looked like in the first and second pictures, with a subtle gradient.

Now, have you remarked I have changed my nail shape? I decided to try stiletto nails (sort of) for the holidays, and I adore them so far. They look fierce without being too aggressive, and they make my fingers look longer... The Boyfriend likes them, but prefers square or oval nails: yup, that means stilettos are ranked 3rd and last, as I've only tried those three nail shapes. Honestly now, what do YOU think about them? Yay or nay?

Whatever, they offer new nail art possibilities that I intend to take advantage of. Take a look of what I have taken with me for a single week away:
I might have been a little overboard... Considering we've traveled in a motorbike, just like last year, in all honesty I think there's more polish than clothes in my luggage... But of course, what we call summer clothes are just tiny teeny pieces of fabric, so I guess it's not that bad. Right?

Off-topic: here's what was written in the French August Cosmopolitan. Loose translation: "Use a base coat and two coats of red polish clumsily applied. The more we overflow the nail the better, this way we will not forget any bit. Then, use a Q-tip with polish remover to clean up the excess and a top coat". 
Right. So this advice sits next to hair oils costing Eur. 30 that are supposed to make mine look like a mermaid's, yes? Oh well, let me see, I think you've lost ALL YOUR CREDIBILITY, Cosmo.

Feel free to think crap about their advice from now on, and take care!

M. 

viernes, 26 de julio de 2013

Work-safe Saran Wrap Manicure

Howdy & HAPPY FRIDAY!

This is one happy day: the day I am starting three whole weeks of holidays. -- The Three Holy Weeks -- I will head to Collioure (France) tomorrow with The Boyfriend, but intend to spend the hottest hours of the day being creative and exploring the nail art world I have been unwillingly neglecting for far too long!

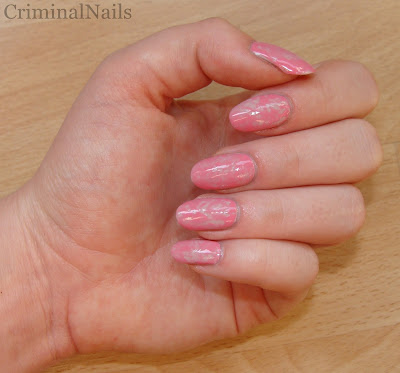
Today's post is my take at a soft and classy manicure wearable at work: a pink and nude saran wrap! Proved to be work-safe: when remarked this week, they have been complimented on :) I was gratified with an "oh wow, your nails match your dress. I am positively impressed. Ah? And you do them yourself? Well, I admire you!". EGO-BOOST.
The ingredients are: two coats of Kiko 372 Nude (of which I bought a back-up just today. My first back-up bottle ever; and that must be worth something!) and one coat of Astor Tickle my Triangle, saran-wrapped, if that's even an expression.

Off I go then, take care!

M.

martes, 23 de julio de 2013

Nail & cuticle oils comparison

Hey you :)

Today's post will be focused on nail and cuticle oils; the ones I've tried over a 3 month period and what I consider to be their pros and cons. Nail polish addiction comes hand in hand with nail and hand care in general, and I know 99% of you are suckers for all hand care-related. The other 1% are too, but just don't know it yet ;)

Let's take a look at our contenders:

  • Orly Argan Cuticle Oil 
  • CND Solar Oil, Nail & Cuticle conditioner
  • Namira pure Almond Oil
  • Floressance pure bio Argan Oil
  • The Body Shop Shea Beautifying Oil

So as you can see not all of these oils were meant specifically for nails or cuticles, for instance the almond, argan and shea oils are not sold as part of hand or nail care routine.

From my fave to my least fave, here are some notes on each and every one of our five contendants:

1. CND Solar Oil, Nail & Cuticle conditioner: all of you know about this oil, no wonder why. It smells nutty and sweet without being too strong, and works wonders. Its main ingredients are almond, jojoba and rice oils, so this stuff is packed with the perfect ingredients to battle dryness. 
I used it on my cuticles as well as on my bare nails, and it has become a part of my nail care routine ever since. What I do is I put on a thick coat of this on my bare nails and let it sit while watching TV, massage the oil into my cuticles and remove the residue before I put my next manicure on. 
It's not an instant miracle, so you got to hold on to it. After a couple of weeks the state of your nails will have greatly improved: more flexible, they will not break as easily, if they ever do.

2. Namira pure almond oil: I have been using this pure almond oil on my hands as an alternative to olive oil. Now, olive oil worked wonders but managed to make me hungry every time... You know, us Mediterraneans put olive oil into every dish, so it was a no go. 
Almond oil has to be kept at room temperature, preferably in a room with constant temp (i. e. avoid the bathroom where the temp is always up and down depending on how hot you take your shower) and never in contact with direct sunlight. Otherwise it will turn sour. 
Aside from that, it is amazing. It has a very subtle nutty smell and moisturizes skin like no other. Con: I know we're talking oils here, but this one is not a quick absorber. I've found it's perfect just before bedtime. I put around two teaspoons of this on my nails and cuticles every night, and they have become prettier than ever :) Just before turning my lights off, I combine it with some Solar Oil on my cuticle area; I just need those two in my life now!

3. Orly Argan Cuticle Oil: this cuticle oil has a lovely citric smell that does not last. Yes, I hate all lemon-related, and yet I can state this stuff has a lemon tinge that smells delicious; I won't say that twice. 
It absorbs quickly and leaves cuticles nice and ready for a whole afternoon at work. Orly qualifies it as being solely a cuticle oil, so I didn't use it directly on my nails.
I can't say this is the cuticle saver, but I will point this out to you: its main components are sunflower, argan and jojoba oils. How's that for moisture? I say we have a pretty good contender here! It now sits somewhere I can easily reach at lunchtime, when I am home.

4. Floressance pure bio Argan Oil: I was sure this would be the ultimate moisturizer beforehand, and I was wrong. It hydrates, yes. But it is by far the most greasy of all the oils I am featuring today. Although when I used it before going to bed, my hands felt dry the next morning when waking up. Like a sort of rebound effect, if that makes any sense. 
But that might not be the most annoying thing of argan oil... I will put it simple: it stinks. In fact, if you turn the bottle you will be able to read that its particular smell is a sign of quality and purity; sounds like an excusatio non petita to me. So, it is agreed: pure argan oil stinks. Which means that every product made out of it will be carrying fragrance, thus resting to its pureness. I could live with that in exchange for some nice smell... but I will surely bear it in mind if looking for a "pure" product. I will not re-purchase this.

5. The Body Shop Shea Beautyfying Oil: This is meant to be a body, hair and face oil. I thought if it worked on the hair it should work on my nails too. Maybe, or maybe not. I haven't been able to really tell if this is worth while, which is not a good sign, huh? 
It contains shea butter and almond oil among its ingredients. Being a dry oil it should absorb quickly, but it doesn't. And the greasy feeling becomes even more bothersome when handling dry oil. Not confortable at all, I just hated this stuff on my hands. The good thing is that is smells amazing.

My veredict is: pure almond oil combined with CND Solar Oil works wonders when used every day before going to bed. What is/are your favourite nail and cuticle products?

I hope this has been useful to you!

Take care,

M.

domingo, 21 de julio de 2013

Bunny up! - Mr. & Ms. Bunny

Hey there!

Yesterday was the perfect day for doing nothing. I went from the bed to my sofa, from my sofa to a rocking chair... and from there to my nail polish station! 

As the madness lowers drastically at work - I guess the judges are on holidays or just too busy thinking about them [can't blame 'em] - my creativity is gradually coming back! Hurray for that :D

So I took my chance at freehanding bunnies, and that's the result:
Please welcome bunnies 3 and 4. Their two predecessors passed out due to deformity. Weird eyes, really. I couldn't do symmetric eyes for the life of me because the white base wasn't even; until I thought to dilute the acrylic paint or paint the face with regular white polish. 
Mrs. Bunny is done with polish (China Glaze Snow) and Mr. Bunny is done with watered acrylic paint. All details have also been done with acrylic paint.

I want to give credit where it's due, but I can't find the source of this tutorial that I used:
And for those of you who pay attention to details... The base color is one coat of Essie Go Overboard + one coat of Sfera Mariana. Quite nice!

Take care, darlings!

M.

miércoles, 17 de julio de 2013

TUTORIAL: Totum Revolutum manicure

Hey you :)

As promised, here's the tutorial for my multi-colored manicure, that I called Totum Revolutum (click here)! Here's what you will going to need:
Introductory notes:

  • Your base coat should be chosen wisely according to the result you are willing to achieve (i. e. for a neon finish, pick up a white), especially if the colors you have chosen are not 100% opaque (hello jellies!).
  • The plastic sheet can be replaced by almost anything plastic, provided that it is easily pliable. You will need to bend it, so try to avoid anything too stiff.
  • The plastic sheet can be transparent or opaque, but remember that only the first will allow you to see: (i) if the polish has covered the wole nail, and (ii) the approximate pattern you've obtained.
  • The paper sheet is merely here to provide you somewhere to stick the plastic pieces after using them, you can replace it by anything of your choice that suits this purpose.
  • I chose three cremes for this tutorial, but there's really no number limit (between 2 colors and the infinity, you're good).

Let's get started:

1. After applying your base color and letting it dry, the first thing you should do is prepare all the nail ware you will going to use for the Totum Revolutum

Cut as many pieces of plastic sheet as nails you will be polishing, and even some more just in case. The pieces should be rectangular, as shown below, so that you can rest your finger on it, securing it, and still use it to mix the colors you have chosen.
2. Work somewhere polish-proof; I used the same ol' plastic mat I use for all my manis.

Start adding blobs of colors randomly, and be sure to be generous. Otherwise, the colors will not mix and the result won't be as nice:
3. The result should look something like the picture below. Let's pospose the cuticle flooding worrying here and let's enjoy the mess!
4. Place a plastic sheet under your finger and secure it so the plastic won't move. Take the other end of the plastic piece and place it over your nail:
5. Stick the plastic to the wet polish on your nail...
6. ... and press your finger randomly over the plastic and the polish, so that the colors will start to blend together. No need to be gentle, but try to cover the whole nail! When you see a nice result through the plastic, take it off.
If you're not satisfied with the end result after taking off the plastic, you can add some more blobs of color and start again right away, until you're happy with it.

Remember to stick the plastic you just used face down on a piece of paper so as to avoid making more of a mess than necessary ;)
7. Use a wooden stick to take the excess polish off your cuticle area and try to trace a nice and curvy line to follow duning the clean up process.

8. Messy as it is, let it dry. 

I waited for around 15 minutes before moving to the next step. It worked for me, but you will want to wait for a little longer if you haven't used speedy dry polishes, or if you have re-started the process on some of the nails ;)
 9. When dry, clean the whole thing up and top coat it! Voilà!
I hope this tutorial will help you in your manicure adventures :) Please do not hesitate to comment below with the links to your own Totum Revolutum, I'd be happy to see what y'all came up with!

Take care,

M.

domingo, 14 de julio de 2013

Totum Revolutum manicure

Howdy! :)

This weekend was as calm as it promised to be, and I took advantage of that to be creative.

I have been eyeballing gorgeous watercolor manicures for quite a while (if you have any good tutorial at hand please figuratively throw it my way!) and... this manicure came up:
The technique I used is very simple, but I will let the pictures do the talking for today ;) The colors used were: Astor's Tickle my Triangle (pink), China Glaze's Kinetic Candy (blue) and Kiko's Melon (orange). But I think it offers endless possibilities... and will probably recreate this with neons, for a start! 

The way the colors end up blending together in some areas, the latin expression Totum Revolutum came to mind... It will be a Totum Revolutum manicure for me, from now on! How do you like it?

As creative as I was I managed to get a photo-tutorial done, for those of you who are interested! I will post this next week, so stay tuned :)

Bonus pic:
Take care,

M.

lunes, 8 de julio de 2013

Kiko nº 356 Melon / Dripping Melon

Hello you polish-infatuated creatures!

How are you doing? I hope you're at the beginning of a calm and sunny week :) I am for now, and so in the mood for a polish which pairs fairly well with Barcelona's weather: Kiko Melon!

This light orange shade has the advantage to suit every skin tone, apart from being absolutely stunning in its simplicity. I say that because it obviously matches amazingly well with my pale skin [cough, cough], but it does match my much tanned friend Sara's skin too! She has been complimented while wearing it with me, so it's not only my positively-predisposed view speaking ;) 

I bought it on my last Kiko spree... which I hope to be soon forgotten and improved by the next one, 'cuz hey! Sales arrived to Kiko! Woohoo! Sadly, I am broke for the occasion... *sigh* 
And... after my first freehanded roses, I decided to try my luck with some blue drips; this is my first time not doing them with a dotting tool but with nail art brushes:
Take care,

M.

miércoles, 3 de julio de 2013

ABC Challenge: Letter Z - Chanel Azuré

Hello you little darlings!

Today's the last entry of this challenge *sad face* It has been a great experience (yay, my first challenge!) and a source of motivation and inspiration all along. I am glad I virtually met all the lovely ladies participating in it, and I am happy to say: Hell yeah! Count me in for the next one!

I am wrapping up the ABC Challenge with a gorgeous polish The Boyfriend gave to me just because he felt like it. Just 'cuz he is awesome like that. Ain't I one lucky lass? I yelled and jumped and didn't stop smiling for a long time... Geeze, it's Chanel's Azuré! 
The pictures above were taken in indirect sunlight, and what you're looking at is two coats + top coat. Super well behaved, the only thing I'd improve is the brush. Stiff and flat, hardly manageable. But manageable after all. I can't wait to wear this in my summer holidays ^^ It looks like mermaid nails...

Girls, it's been a pleasure! See you in no time, for the next challenge! :)

Take care,

M.